Class Management
In Wardian, a Class is more than just a label—it is a functional blueprint that defines the core identity, intelligence, and equipment of your agents.
Use Class Management when you want future agents to start with consistent instructions, provider-ready skills, and a recognizable role.
Classes are Wardian's reusable agent blueprints. They turn repeated setup choices into editable, inspectable context so you can evolve an agent role over time instead of copying the same instructions into every new session.
When to Use It
- Create a repeatable role such as
Coder,Reviewer, orResearcher. - Tune an existing role before spawning more agents from it.
- Assign skills at the class level so every new instance starts with the same capabilities.
Basic Workflow
Class management lives in the Classes tab on the left control rail.
- Click the Classes icon in the left control rail.
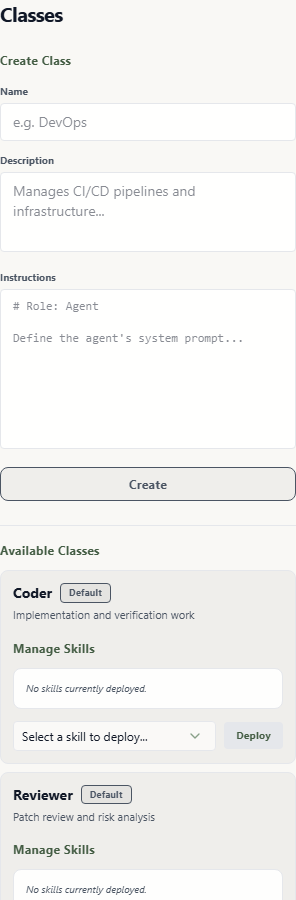
- Browse the list of available classes or create a new class.
- Enter the class name, description, and instructions.
- Assign class-level skills from the class card.
- Spawn a new agent from the class in the left Agent Configuration tab.
Configuring a Blueprint
1. Instruction Set (AGENTS.md)
Each class is governed by a markdown file. This is where you define:
- Role & Personality: Who the agent is (e.g., "A skeptical security auditor").
- Constraints: What the agent cannot do (e.g., "Never overwrite existing .env files").
- Standard Procedures: How the agent should approach tasks (e.g., "Always draft a plan before executing").
2. Pre-Assigned Skills
You can pre-load a class with specific modular skills.
- When you assign a skill to a class, every agent spawned from that blueprint receives the skill through its provider's discovery path. Wardian may use directory links, provider home projection, generated config, or provider-native include roots depending on the selected CLI.
- This ensures your
Coderclass always starts withgithub-cliandtypescript-toolsready to go.
3. Registry Persistence
All your custom classes are stored in <wardian-home>/classes.json. This single file is the source of truth for the Rust backend when spawning new sessions.
Spawning from a Class
To use your blueprint:
- Navigate to the Agent Configuration tab in the Left Sidebar.
- Select your class from the dropdown.
- Click Initialize. The agent will inherit the selected class instructions and class-level skill assignments.
Important Limits
- Editing a class changes future spawns; it does not rewrite instructions inside already-running provider sessions.
- Class skills are adapted to each provider's discovery model. Check Provider Runtimes when a provider does not expose a skill as expected.
- Keep class instructions durable and general. Put task-specific instructions in prompts, broadcasts, workflows, or direct terminal messages.
- Treat class edits as shared capability changes. When an instruction is only useful for one project, agent, or workflow run, keep it in that narrower scope until it proves reusable.