First-Time Install and First Run
Use this guide to get from a fresh Wardian install to a completed first agent task. It is the canonical beginner path for people who want to run the desktop app rather than develop Wardian itself.
If any first-run step fails, use First-Run Troubleshooting to recover without switching to developer-only diagnostics.
1. Install and Launch Wardian
Use the supported install path for your platform, then launch Wardian from your operating system.
| System | Install |
|---|---|
| Windows x64 | winget install WardianApp.Wardian |
| macOS Apple Silicon or Intel | brew install --cask wardian-app/tap/wardian |
| Linux Debian/Ubuntu x64 | Download Wardian_X.Y.Z_amd64.deb from Releases, then run sudo apt install ./Wardian_X.Y.Z_amd64.deb. |
| Linux other x64 | Download Wardian_X.Y.Z_amd64.AppImage from Releases, then run chmod +x Wardian_X.Y.Z_amd64.AppImage && ./Wardian_X.Y.Z_amd64.AppImage. |
Manual downloads are also available from the Wardian releases page.
Choose the asset for your operating system and CPU:
| System | Download asset | Notes |
|---|---|---|
| Windows x64 | Wardian_X.Y.Z_x64-setup.exe | Standard Windows installer. |
| macOS Apple Silicon | Wardian_X.Y.Z_aarch64.dmg | For M-series Macs such as M1, M2, M3, or M4. |
| macOS Intel | Wardian_X.Y.Z_x64.dmg | For older Intel Macs. |
| Linux Debian/Ubuntu x64 | Wardian_X.Y.Z_amd64.deb | Installable Debian package. |
| Linux other x64 | Wardian_X.Y.Z_amd64.AppImage | Portable Linux app. |
x64 and amd64 both mean 64-bit Intel/AMD CPUs. On macOS, Apple Silicon uses aarch64, not x64. Ignore updater-only assets such as latest.json, .app.tar.gz, or .sig files when installing manually.
Debian/Ubuntu users who want package-manager updates can use the optional Wardian APT repository.
Wardian binaries are currently unsigned:
- Windows: SmartScreen can show a warning. Choose More info, then Run anyway.
- macOS: Gatekeeper can block the first launch. Right-click Wardian and choose Open.
- Linux: APT installs update through the system package manager. Make the AppImage executable before running it.
chmod +x Wardian*.AppImage
./Wardian*.AppImage
PowerShell:
# Windows installer builds normally launch from the Start menu after install.
# Use the downloaded .exe directly only if you intentionally chose a portable build.
.\Wardian*.exe
Before the first spawn, verify the provider command, authentication, and shell PATH using Provider Readiness.
If Wardian will not launch or your provider is not detected after installation, see First-Run Troubleshooting.
2. Install One Supported Provider CLI
Wardian runs local provider CLIs inside managed terminals. Install and authenticate at least one provider before spawning an agent:
| Provider | Install command | Basic check |
|---|---|---|
| Antigravity | See the Antigravity CLI overview | agy --version |
| Claude Code | npm install -g @anthropic-ai/claude-code | claude --version |
| Codex | npm install -g @openai/codex | codex --version |
| OpenCode | Provider package that exposes opencode | opencode --version |
| Gemini CLI (unmaintained) | npm install -g @google/gemini-cli | gemini --version |
Run the check from a normal terminal first. If the command is not found there, Wardian usually will not find it either.
3. Authenticate Outside Wardian
Start the provider directly once and complete any sign-in prompt before launching it through Wardian.
agy
claude
codex
opencode
gemini
Use only the provider you installed. Exit the provider after it reaches its normal ready state.
PowerShell uses the same provider commands:
agy
claude
codex
opencode
gemini
If a provider asks you to sign in again inside Wardian, finish that prompt in the agent terminal. For provider-specific runtime details, see Provider Runtimes.
4. Confirm Runtime Settings
Open the Settings rail item and confirm Wardian has a usable shell. Auto is the right default for most first runs.
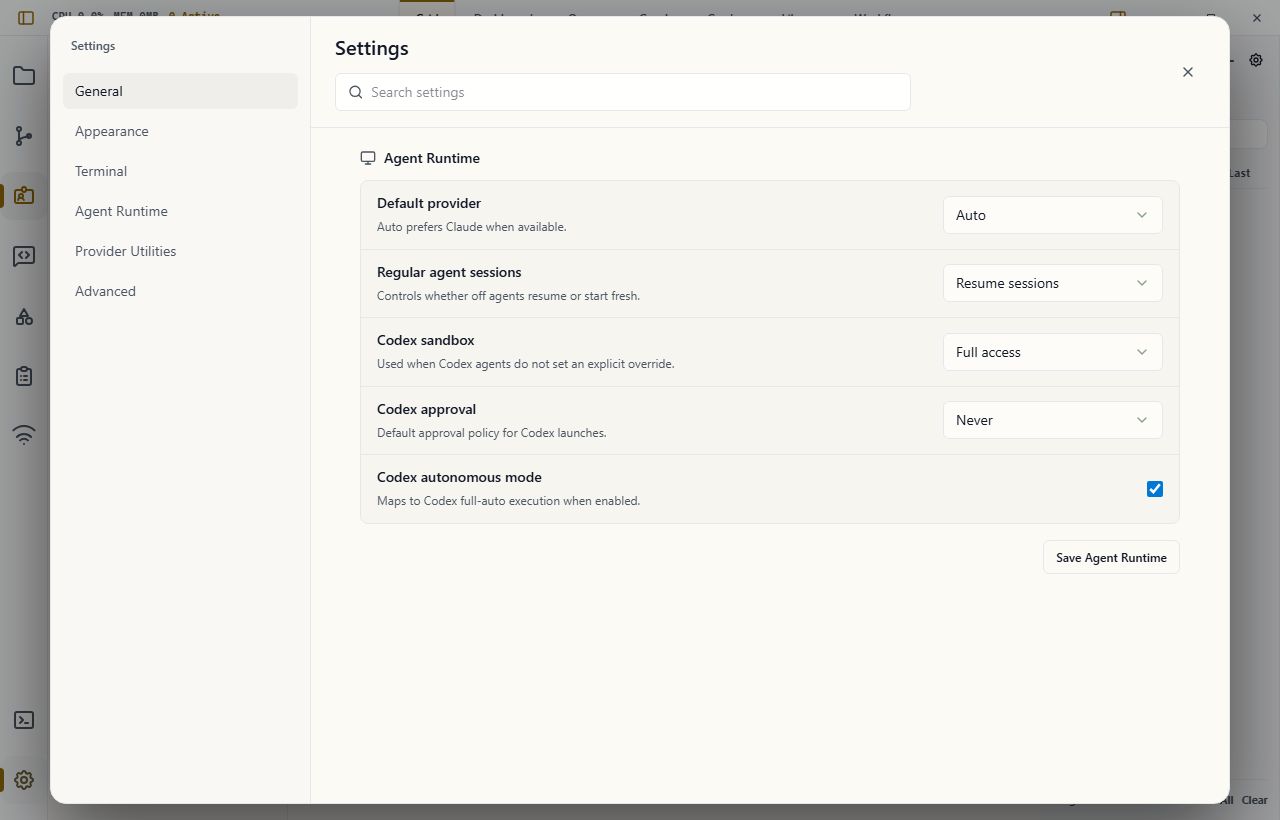
If your provider works in one shell but not another, select the shell where the provider command is visible, save the setting, and spawn the agent again. See Settings for shell and provider runtime notes.
5. Choose a Workspace
Pick the project or folder the agent should work in. Use an absolute path.
cd <absolute-workspace-path>
pwd
PowerShell:
Set-Location <absolute-workspace-path>
Get-Location
Use the resulting absolute path in the spawn form. Do not use a private credential folder or a provider configuration directory as the workspace.
6. Spawn the First Agent
Open the Agent Configuration rail item and fill in the spawn form:
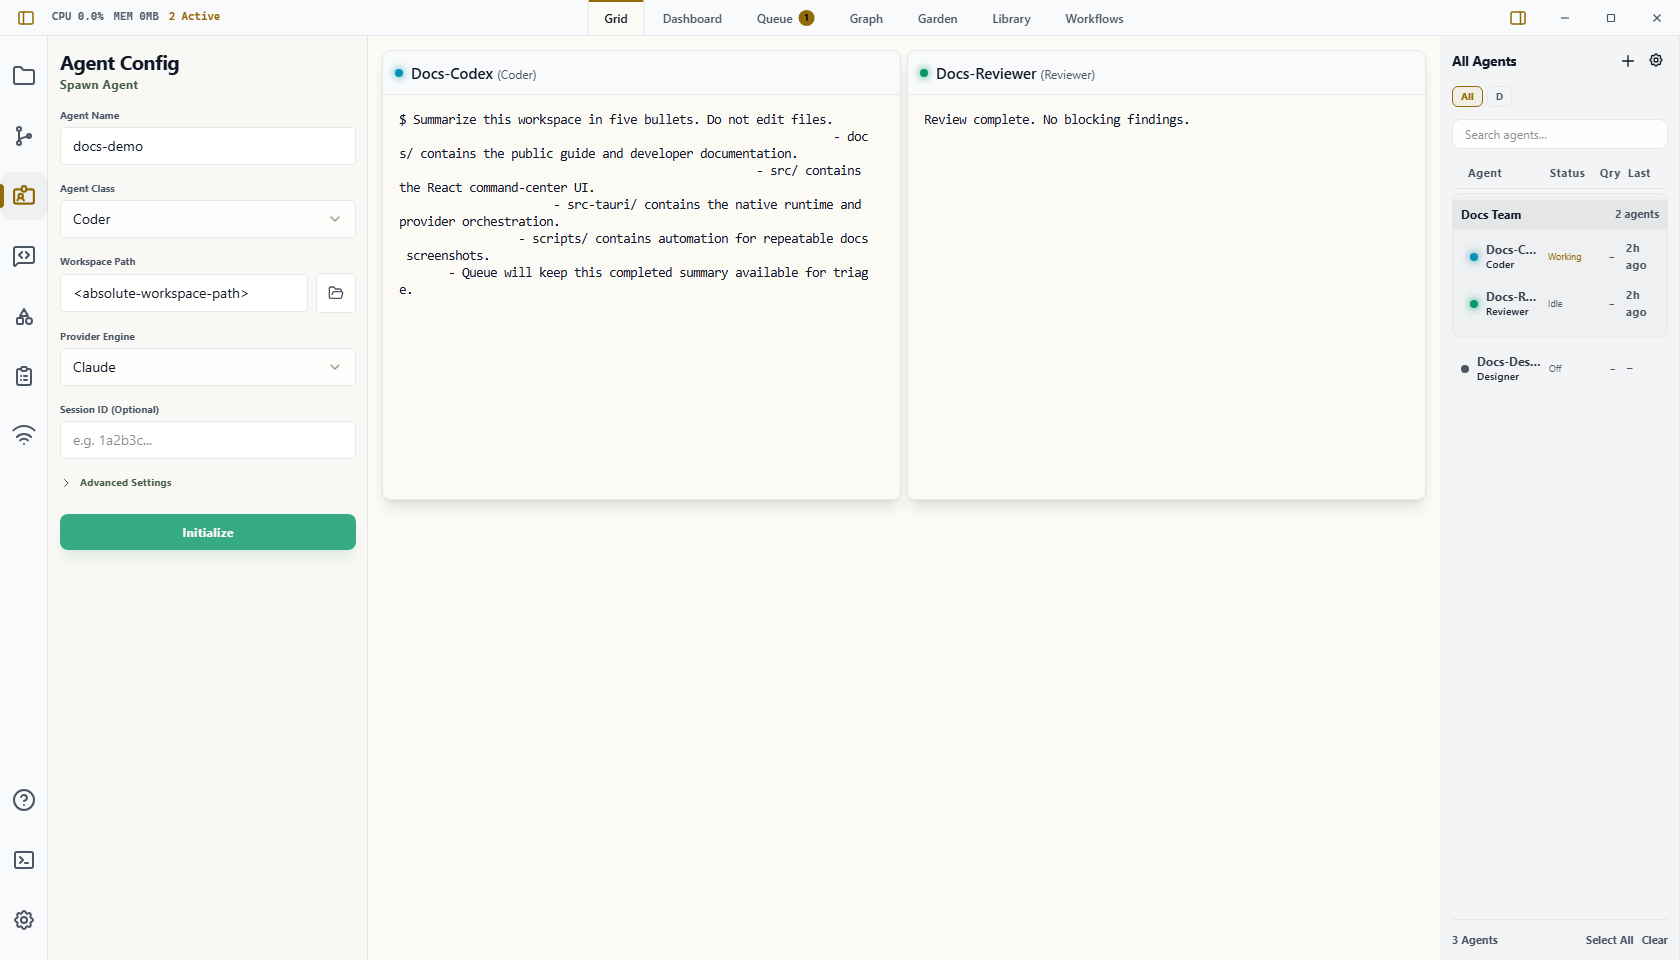
- Choose an agent class, such as Coder or Researcher. Classes are reusable blueprints; see Class Management when you want to inspect or customize them.
- Select the provider you installed and authenticated.
- Enter a short agent name.
- Set the workspace to
<absolute-workspace-path>. - Click Initialize.
The new agent appears in the right roster and in the Grid.
Status colors help you read the first launch:
- Emerald / Idle: the agent is ready for an instruction.
- Cyan / Processing: the provider is starting or responding.
- Amber / Action Required: the provider needs approval or sign-in input.
- Red / Error: the provider or shell failed to start.
If the terminal stays blank, exits immediately, or the agent remains stuck in Processing, Off, or Action Required, use the first-run terminal checklist.
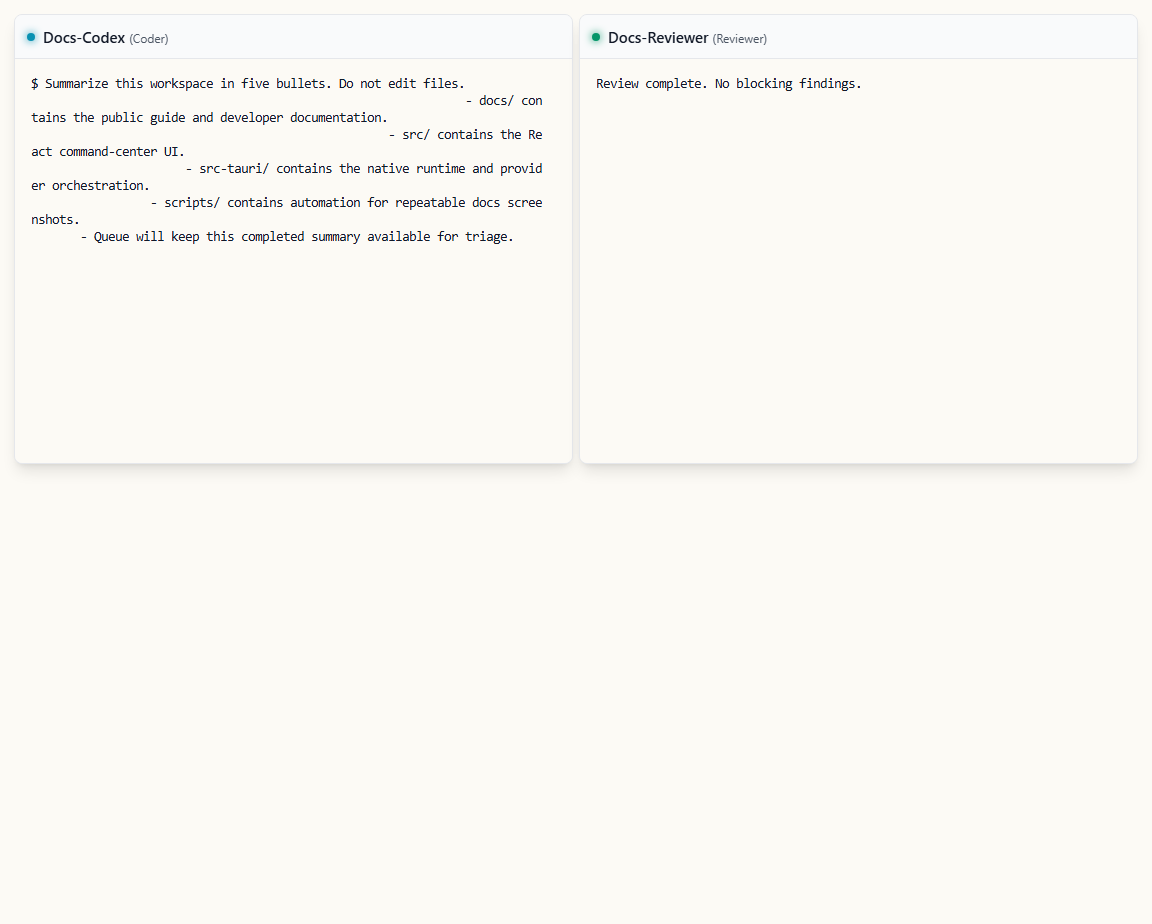
7. Send the First Instruction
Click inside the agent terminal and send a small, low-risk instruction:
Summarize this workspace in five bullets. Do not edit files.Use a read-only prompt for the first run. After you trust the provider, you can ask it to inspect files, make changes, run commands, or coordinate with other Wardian agents.
8. Review the Result in Queue
When an active agent finishes and returns to Idle, Wardian adds a completion item to Queue. Open Queue from the top workspace tabs and review the result.
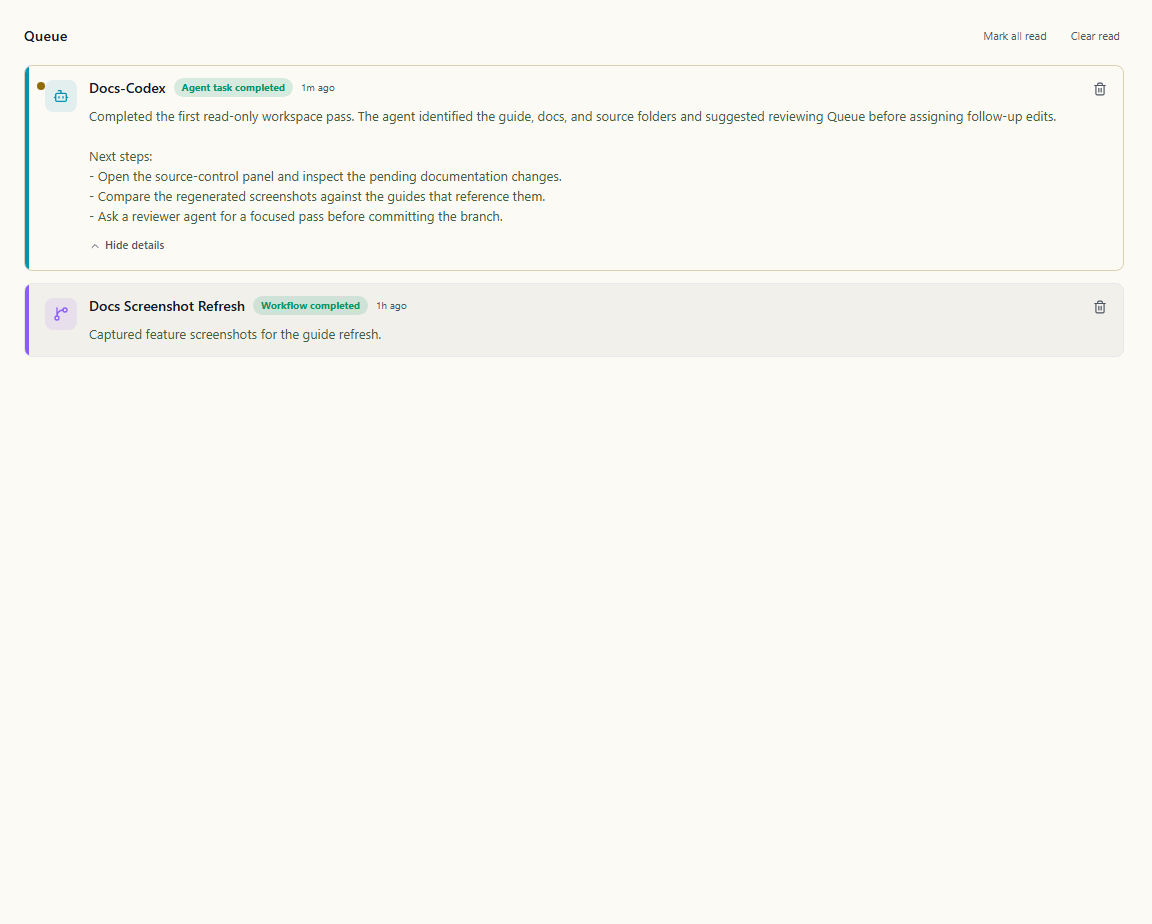
Use Queue to keep completed work from disappearing into terminal scrollback:
- Open unread items first.
- Expand long summaries when needed.
- Mark reviewed items read.
- Clear read items after triage.
See Queue for the full triage workflow.
9. Check the Wardian CLI
Wardian installs a wardian command for agents and automation. With the desktop app running, use a normal terminal to confirm Wardian can list sessions:
wardian agent list --scope all --fields name,status,workspacePowerShell:
wardian agent list --scope all --fields name,status,workspaceIf the command is not visible in your normal terminal, restart the terminal after installing Wardian. Managed agent terminals receive Wardian's CLI path automatically.
If the First Run Fails
Start with the visible failure point:
- Provider command not found: verify the provider command works in a normal terminal and that Wardian is using the same shell.
- Provider asks for authentication: complete the provider sign-in flow, then restart the agent.
- Agent stays Off or Error: check the agent terminal output and provider runtime notes.
- Queue stays empty: confirm the agent actually returned from Processing to Idle after producing output.
Related docs:
Next Steps
- Learn the main windows in UI Overview.
- Recover from first-run launch, provider, terminal, Queue, and CLI failures in First-Run Troubleshooting.
- Manage reusable prompts and skills in Library.
- Inspect or customize agent classes in Class Management.
- Browse your agent's local files in Explorer.
- Send one instruction to multiple agents with Command Panel.
- Use the agent-facing Wardian CLI for scripted coordination.
- Triage completed work in the Queue.
- Manage per-agent Git operations in Source Control.
- Configure runtime behavior and shell defaults in Settings.
- Verify provider commands and authentication in Provider Readiness.
- Compare provider runtime behavior in Provider Runtimes.
- Automate complex tasks with Visual Workflows.